Table of Contents
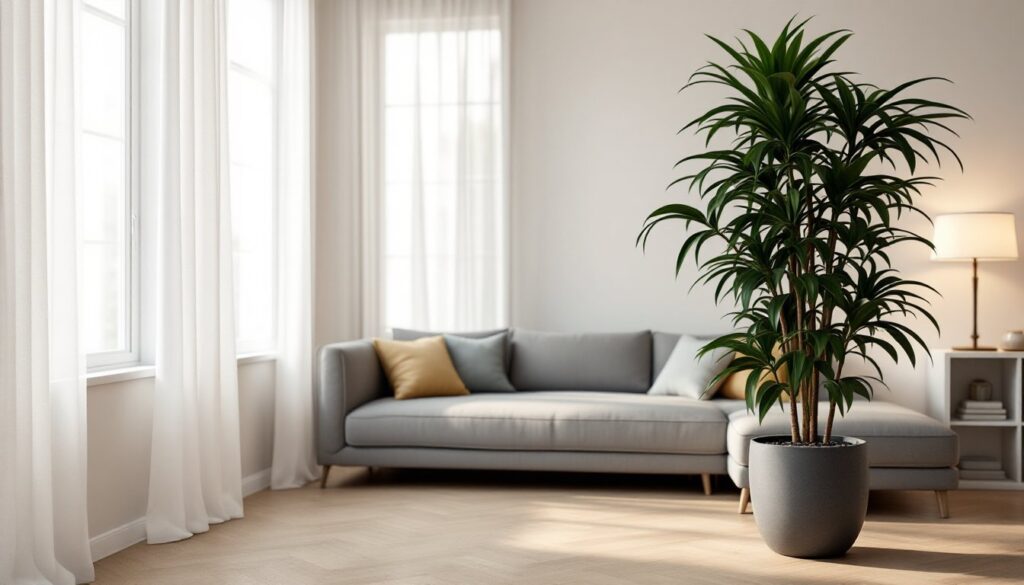
ToggleA well-placed plant stand can be the difference between a houseplant collection that looks like an afterthought and one that becomes a focal point. With more homeowners bringing greenery indoors, the humble plant stand has evolved from a basic pedestal to a versatile design element that solves problems, lifting plants into better light, protecting floors from water damage, and maximizing vertical space in tight quarters. Whether you’re working with a sun-soaked bay window or a dim hallway corner, the right stand elevates both the plants and the room’s aesthetic.
Key Takeaways
- An indoor plant stand elevates your plant collection by improving air circulation, preventing root rot, and creating eye-level displays that make plant care and pest monitoring easier.
- Multi-tier and corner plant stands maximize vertical space in apartments and small rooms, turning blank corners into lush displays without consuming valuable floor space.
- Choosing the right plant stand requires measuring your space, matching stand height to plant type, and prioritizing weight capacity with solid wood or welded steel construction over particleboard.
- Styling a plant stand professionally involves varying plant heights, grouping pots in odd numbers, and leaving breathing room between pots to prevent fungal issues and allow comfortable watering access.
- DIY plant stands with hairpin legs and wood tops are achievable in 2–3 hours with basic tools and materials, offering a customizable, cost-effective alternative to store-bought options.
- Built-in drip trays, adjustable shelves, and locking casters on your plant stand protect floors, accommodate different pot sizes, and simplify seasonal light adjustments and cleaning.
Why Indoor Plant Stands Are Essential for Your Home
Plant stands aren’t just decorative, they’re functional tools that improve plant health and room usability. Elevating plants off the floor increases air circulation around the pot, which helps prevent root rot and mildew buildup in humid environments. It also puts foliage at eye level, making it easier to spot pests, yellowing leaves, or soil that needs watering.
For homes with limited square footage, stands make vertical space productive. A multi-tier stand can hold six to eight pots in the footprint of a single floor plant, turning a blank corner into a lush display. This is especially useful in apartments or rooms where floor space is spoken for.
Stands also protect surfaces. Even with saucers, watering can lead to condensation and staining on hardwood, tile, or carpet. A stand with a sealed top or built-in drip tray keeps moisture away from flooring. For renters, this means avoiding deposit deductions.
Finally, stands let you tailor light exposure. Moving a low-light tolerant plant like a pothos or snake plant onto a stand near a north-facing window gives it the indirect brightness it needs without scorching. Conversely, sun-loving cactus varieties thrive on stands positioned in south or west windows.
Types of Indoor Plant Stands to Consider
Single-Tier vs. Multi-Tier Stands
Single-tier stands are simple platforms, usually a tabletop supported by three or four legs. They work best for statement plants: a large fiddle-leaf fig, a mature monstera, or a trailing vining plant that needs room to cascade. Heights range from 12 to 36 inches, with taller stands suited for low-light floor plants that need a boost toward ambient brightness.
Materials include:
- Wood (pine, oak, bamboo): Classic look, but requires sealing or a waterproof tray to prevent water stains.
- Metal (powder-coated steel, wrought iron): Durable and moisture-resistant. Look for rubber feet to avoid scratching floors.
- Mid-century modern hairpin legs: Popular in 2026 designs, often paired with round or square wood tops.
Multi-tier stands stack two to five shelves vertically or in a ladder configuration. They’re space-efficient but require planning. Place taller plants on lower shelves so they don’t block light from smaller pots above. Shelf depth typically runs 8 to 12 inches, wide enough for a standard 6-inch nursery pot but too narrow for oversized planters.
Ladder stands lean against a wall at a 60 to 75-degree angle and distribute weight across progressively wider shelves. They’re stable without anchoring, though homes with pets or toddlers should secure the top rung to a wall stud using an L-bracket and #8 wood screws.
Corner Stands and Hanging Options
Corner stands fit into 90-degree angles, making use of dead space. Tiered corner units are common in kitchens and bathrooms, where humidity benefits ferns and tropical plants. Most are triangular or quarter-circle in footprint, with shelf radii between 10 and 14 inches.
These work well for collections of smaller pots (4-inch to 6-inch), but weight capacity matters. Cheaper particleboard models max out around 15 pounds per shelf: solid wood or welded steel handles 25 to 40 pounds. Always check manufacturer specs before loading multiple ceramic pots with wet soil.
Hanging stands suspend pots from ceiling hooks or wall-mounted brackets. Macramé hangers and tiered hanging planters saw renewed interest in 2025 and remain popular in 2026. Install ceiling hooks into a joist (locate with a stud finder) using ¼-inch lag screws rated for the combined weight of pot, soil, and plant. Standard drywall anchors fail under sustained load, especially once soil is saturated.
For renters, tension-rod hangers wedged in window frames or doorways offer a no-drill alternative, though weight limits stay under 10 pounds per rod.
How to Choose the Right Plant Stand for Your Space
Start with measurements. Measure the floor space, the ceiling height, and the distance to the nearest window. A 30-inch-tall stand placed 3 feet from a window won’t give a shade-loving plant any advantage, but it might scorch a sun-sensitive one.
Match stand height to plant type. Trailing plants like string-of-pearls or philodendron look best on stands 24 inches or taller, where vines can drape freely. Compact plants, succulents, small ferns, low-maintenance cacti, suit shorter stands or tabletop risers.
Consider weight capacity honestly. A ceramic pot holding a mature snake plant can weigh 20 to 30 pounds when watered. Multiply that across three tiers, and you’re pushing 60 to 90 pounds on a stand that might only be rated for 50. Check product specs, and when in doubt, err toward overbuilt construction, solid wood or welded steel over particleboard or thin aluminum.
Style should follow function, not lead it. A mid-century wood stand fits well in living rooms with existing wood furniture. Industrial metal stands suit lofts or modern kitchens with stainless fixtures. For eclectic spaces, mix materials: a metal frame with a wood top offers contrast without clashing.
Practical features to prioritize:
- Adjustable shelves: Let you customize spacing for taller pots.
- Built-in drip trays or saucers: Catch overflow without extra accessories.
- Casters or wheels: Make it easy to move stands for cleaning or seasonal light adjustments. Look for locking wheels to prevent drift on sloped floors.
- Assembly difficulty: Some stands ship flat-pack and require 30 minutes with an Allen wrench. Others arrive fully assembled. If you’re not confident with furniture assembly, pay the premium for pre-built.
Styling Your Indoor Plant Stand Like a Pro
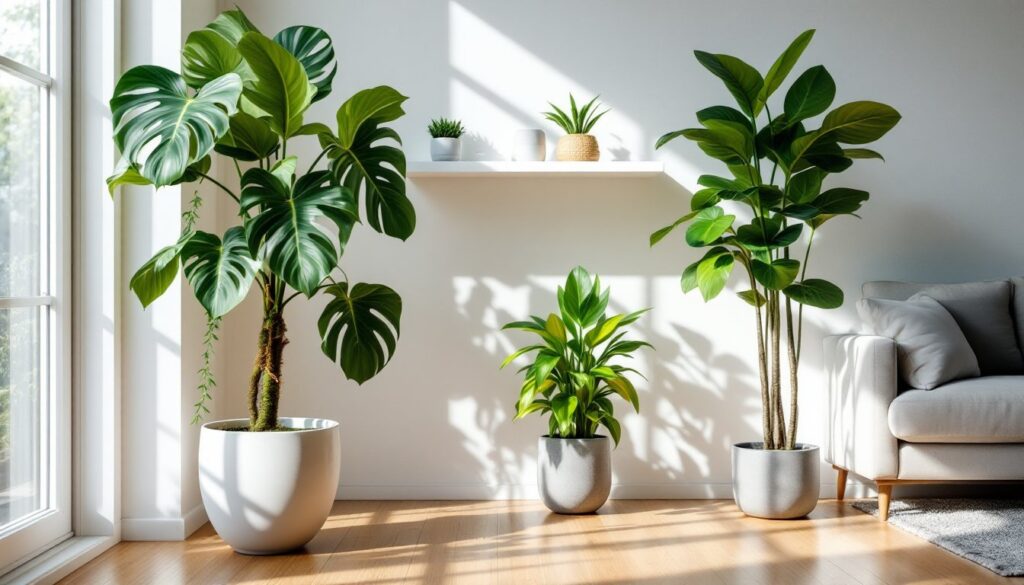
Start with varying heights and textures. Place a tall, upright plant (like a dracaena or ZZ plant) on the top tier or back shelf. Add mid-height, bushy plants (pothos, peperomia) in the middle. Finish with trailing or ground-hugging plants (string-of-hearts, creeping fig) on lower shelves where vines can cascade. This creates visual movement and prevents the display from looking flat.
Group pots in odd numbers, three or five, rather than pairs. The asymmetry feels more organic. Mix pot materials and colors, but keep a unifying element: all terracotta, all matte white ceramic, or all woven baskets. Too many finishes create clutter.
Leave breathing room. Crowding pots makes watering tedious and restricts airflow, which invites fungus gnats and mildew. A good rule: if you can’t comfortably reach each pot without moving another, it’s too tight.
Incorporate non-plant elements sparingly. A small stack of gardening books, a vintage watering can, or a humidity gauge can add personality without stealing focus. Avoid tchotchkes that collect dust or compete visually with the plants. The stand should frame the greenery, not distract from it.
For design inspiration and seasonal styling ideas, Better Homes & Gardens offers photo galleries that show how professionals layer color and texture. Similarly, Gardenista features minimalist plant displays suited to modern interiors.
Lighting matters as much as styling. If natural light is insufficient, add a clip-on LED grow light (look for full-spectrum bulbs rated 5000K to 6500K) to the top tier. Position it 12 to 18 inches above foliage for low-to-medium light plants. For homes already filled with air-purifying varieties, supplemental lighting can extend their effectiveness in windowless rooms.
DIY Indoor Plant Stand: Build Your Own in 5 Easy Steps
Building a simple single-tier stand takes about two hours and requires basic carpentry skills. This design uses a round wood top and three hairpin legs, a style that’s popular in 2026 and adaptable to any room.
Materials:
- One ¾-inch plywood round (12-, 16-, or 20-inch diameter, depending on pot size)
- Three 16- to 28-inch hairpin legs (steel, powder-coated)
- #8 x ¾-inch wood screws (9 total, 3 per leg)
- Sandpaper (120-grit and 220-grit)
- Wood stain or polyurethane sealer
- Drill with Phillips bit and ⅛-inch pilot bit
Tools:
- Cordless drill
- Tape measure
- Pencil
- Orbital sander (or sanding block)
- Paintbrush or foam applicator
- Safety glasses and dust mask
Step 1: Prep the wood top.
Sand the plywood round with 120-grit sandpaper to remove rough edges and splinters, then finish with 220-grit for a smooth surface. Wipe away dust with a damp cloth. If the wood has a raw or unfinished appearance, apply one coat of stain or sealer and let it dry per manufacturer instructions (typically 4 to 6 hours). A sealer is essential, it protects against water rings from pot saucers.
Step 2: Mark leg positions.
Flip the wood round upside down. Divide the circle into three equal sections (120 degrees apart). Measure 2 inches in from the edge at each mark, this is where the leg mounting plate will sit. Use a pencil to trace the outline of each leg’s mounting plate.
Step 3: Drill pilot holes.
Hairpin legs come with pre-drilled mounting plates, usually with three holes per leg. Align the first leg’s plate with your pencil outline. Mark the screw holes with a pencil, then drill ⅛-inch pilot holes about ½ inch deep. Pilot holes prevent the plywood from splitting when you drive screws. Repeat for all three legs.
Step 4: Attach the legs.
Position the first leg and drive three #8 x ¾-inch wood screws through the mounting plate into the pilot holes. Tighten until snug, but don’t overdrive, stripping the threads in plywood is easy. Repeat for the remaining two legs. Check that all legs are flush and level.
Step 5: Flip and finish.
Turn the stand upright. Check stability on a flat surface. If it wobbles, adjust one leg slightly (some hairpin legs have rubber feet that can be twisted to micro-adjust height). Place a pot saucer or drip tray on top before adding your plant to catch any water overflow.
Optional upgrades:
For a multi-tier version, stack two or three rounds at different heights using longer legs and add a mid-span shelf by drilling additional mounting holes halfway up the legs. For more complex woodworking projects and detailed plans, Instructables hosts dozens of plant stand tutorials with photos and cut lists.
Safety note: Wear safety glasses when drilling and a dust mask when sanding or applying finishes. Work in a ventilated area, especially when using stains or sealers with VOCs.